
There are several useful programs available for emulating the Apple II series of computers. This Hands On Museum tutorial will focus on just one. When you become familiar with one specialized emulator, you learn to understand how to work most of the others. The emulator for this tutorial will be the AppleWin emulator.
AppleWin is a Windows friendly and nearly a completely tunrkey emulator. It operates as an original Apple II, II+, IIe, or IIe Enhanced, with the latter configured as the default emulation mode. To get started, download the ZIP file on AppleWin emulator home page:
https://github.com/AppleWin/AppleWin/releases/download/v1.25.0.3/AppleWin1.25.0.3.zip
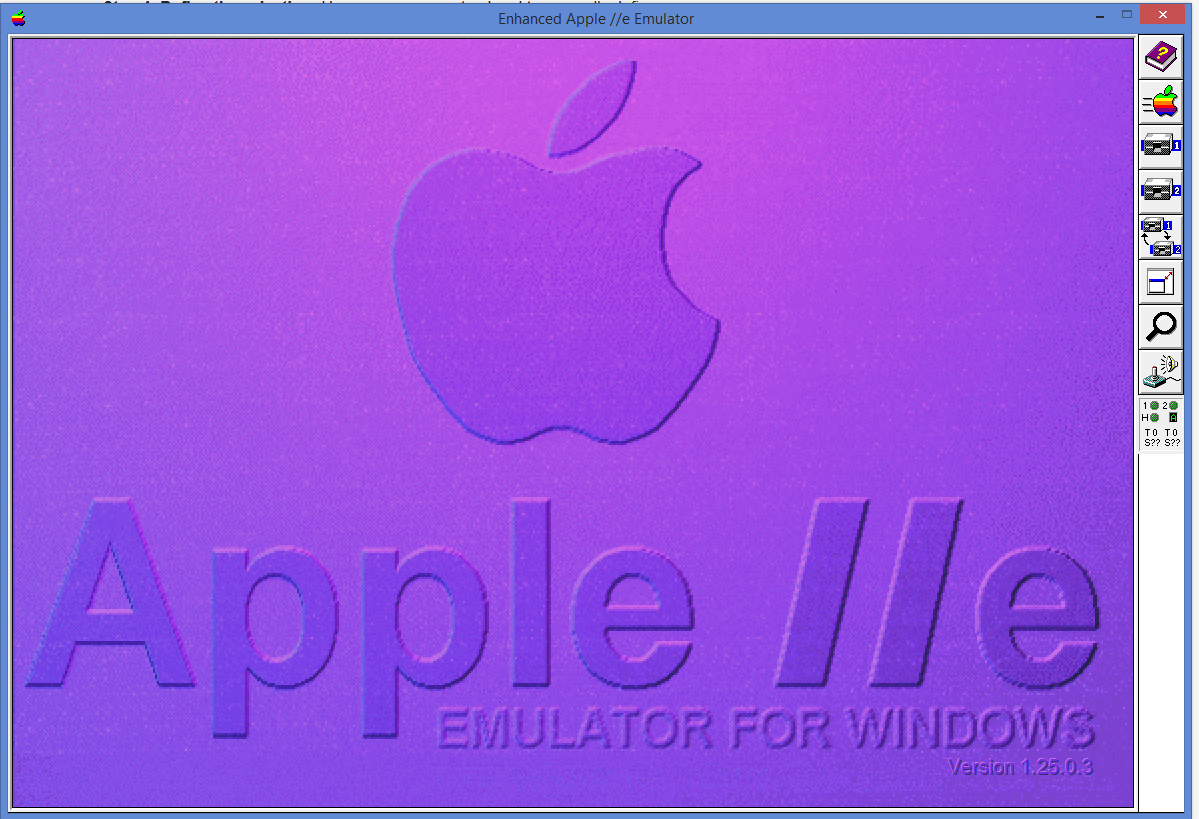
After downloading, open up the ZIP file and extract the contents to a fresh new directory on your computer. I recommend making an AppleWin directory in your “My Documents” folder for this purpose. After extracting, go to the folder you extracted AppleWin to and run the AppleWin program. The icon looks like the famous Apple II color logo. When you first run it, it will ask you to accept a GNU General Public License before allowing you to get started. After you accept that, it will show you a window that looks like this:
On the right hand side of the AppleWin window, you’ll see some icons representing certain emulator functions. two of the icons look like disk drives and have the numbers ! and 2 on them respectively. These represent the two disk drive Disk ][ system on a conventional Apple II. To get started with the emulator, you’ll need a boot disk image. Disk images for AppleWin are in .DSK format. AppleWin comes with a boot disk to get you started with a system that lets you use BASIC.
Click the Disk 1 image, or press F3, and you will be prompted to select a disk image. In the AppleWin folder, you should find MASTER.DSK. Load that file and you have now “inserted a disk” in the disk drive. Then click the Apple icon, or press F2, to reboot the Apple ][. You should get a beep sound and then end up at the Apple ][ BASIC cursor. Now, let’s try something many people did when tinkering with these computers at the store back in the day. Let’s write a small BASIC program to scroll text on the screen. Enter the following lines of text, as written, hitting ENTER after each one:
10 PRINT "HELLO........";
20 GOTO 10
There are eight dots after the word HELLO in the first line. The number of dots makes a significant difference in the way the program displays the text in this example program. To see the program in action, just type
RUN
followed by the ENTER key and watch the display. While this program is running, let’s play around with some of the display features built into AppleWin.
If you want to change your monitor type between color, monochrome white, monochrome green, and monochrome amber, press the F9 key to cycle through the different screen types.
To switch between windowed and full screen mode, press F6 to toggle between them.
To stop the running program, press CTRL-C, which will return you to the BASIC prompt. To see your the BASIC program in memory, type
LIST
followed by the ENTER key. You will now see both lines of the program you typed in.
But we know that these emulators are best when we can play the old games that were made for them! To do that, you will need to have a disk image of an original Apple II game. Fortunately, there is a large archive of vintage Apple II software at:
ftp://ftp.apple.asimov.net/pub/apple_II/images/
Feel free to browse that site all you want, but to continue with this tutorial, it is suggested that you download a single game disk file. Perhaps Pacman will be a familiar example. You can download the DSK file directly by clicking on this link:
ftp://ftp.apple.asimov.net/pub/apple_II/images/games/action/PACMAN.DSK
It’s best to download the disk file to the AppleWin folder. Otherwise, make a note of where you downloaded it. To “insert” the disk into the emulator, click on the Disk 1 icon on the right side of the AppleWin screen. This will open a standard file requester. Find the PACMAN.DSK file, select it, and click the OPEN button. The disk is now inserted into the drive!
This Pacman disk is self-booting. Many preconfigured games and applications for the Apple II were made this way. It doesn’t hurt to try and see if a disk is self booting. To do so on a real Apple II, you would either power it off and on, or press CTRL-RESET. On this emulator, you only need to click the color Apple logo above the Disk 1 icon.
Go ahead and click it. You’ll first receive a “reboot warning.” This does not happen on a real Apple II. It is only a warning from the emulator itself, telling you that you are about to reset the Apple II emulation. Click YES to continue. You’ll hear a beep and after about a ten second wait on a black screen, the Pacman game configuration screen will appear.
You’ll be asked if you want to use the keyboard or joystick to play. Keep in mind that the emulator is behaving like a real Apple II, so any games on it will think you are using real Apple II hardware. Yes, you can use any type of PC based joystick in this emulator, but joysticks can be a bit tricky at first to configure for an emulator. I recommend using the keyboard option, so press “1” to continue.
You will then be asked to choose a “Normal or Customized Keyboard.” For simplicity, choose “N” for the Normal option. This is an option for the Pacman game and not a typical option for the Apple II in general. Another Apple II game or application may not ask you to choose a joystick or custom keyboard.
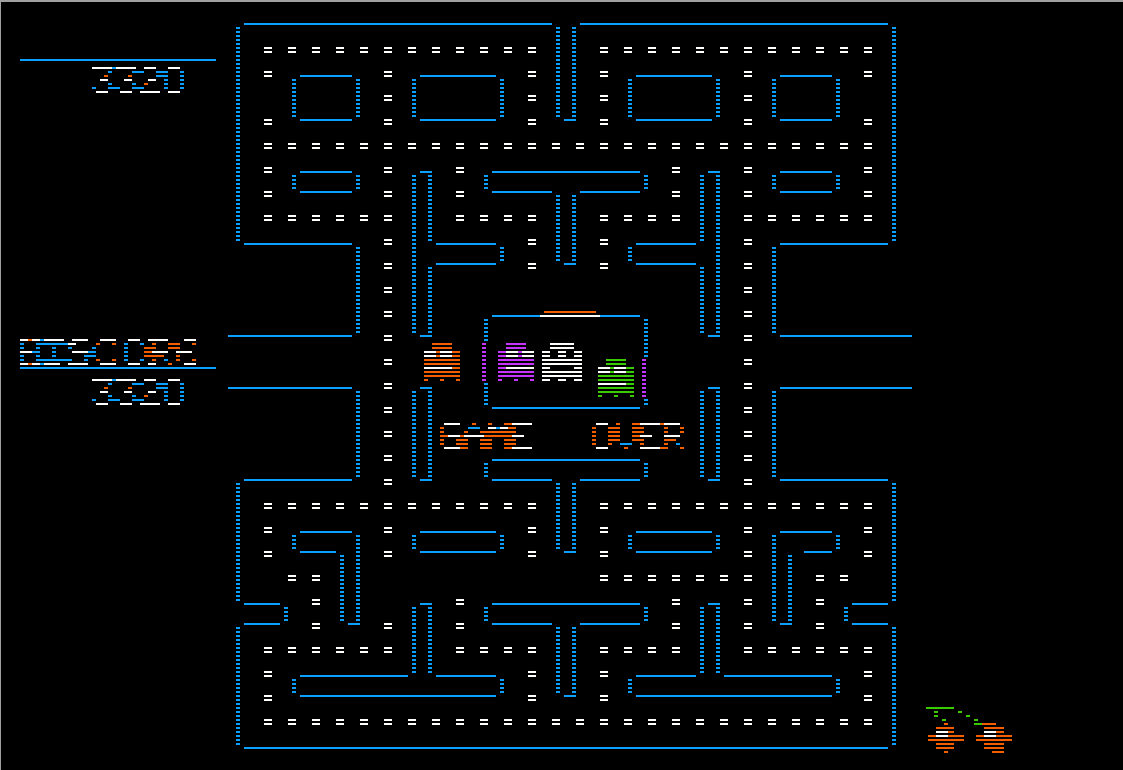
After selecting Normal, the PacMan opening screen appears. To play a new game, follow the on-screen instructions and hit the Space Bar. You will be asked how many players are playing. Choose the appropriate number, followed by “Return (or Enter)”, and you’re off!
The “Normal” keyboard layout for this game is a bit awkward at first, but this is something we all dealt with back in the day when computer joysticks were options that were not readily affordable and we had no choice but to use the keyboard. This is the game’s keymap:
- UP: a
- DOWN: z
- LEFT: Left-Arrow
- Right: Right-Arrow
It’s basically a two handed set of controls. So go ahead and have fun at this Pacman clone! When you are finished, go back to that link above where all of the Apple II disk images are and try something else. If you find yourself enjoying the use of this Apple II emulator, there should be enough software at your disposal to operate this emulated Apple II with all of the functionality it had back in the day.